We’ve all been there: a brilliant product idea hits you while you’re at a coffee shop. You grab a napkin, scribble a rough sketch, and think, “I wish I could see what this looks like in 3D.”
Historically, that next step required hours—if not days—of CAD modeling and rendering. But in 2026, the gap between a “napkin sketch” and a “product rendering” has all but vanished. For the individual creator, AI isn’t just a corporate tool; it’s a personal design studio.
Here is how you can use the AI design stack today to turn your sketches into physical 3D prints.
Step 1: The “Sketch-to-Render” Transformation
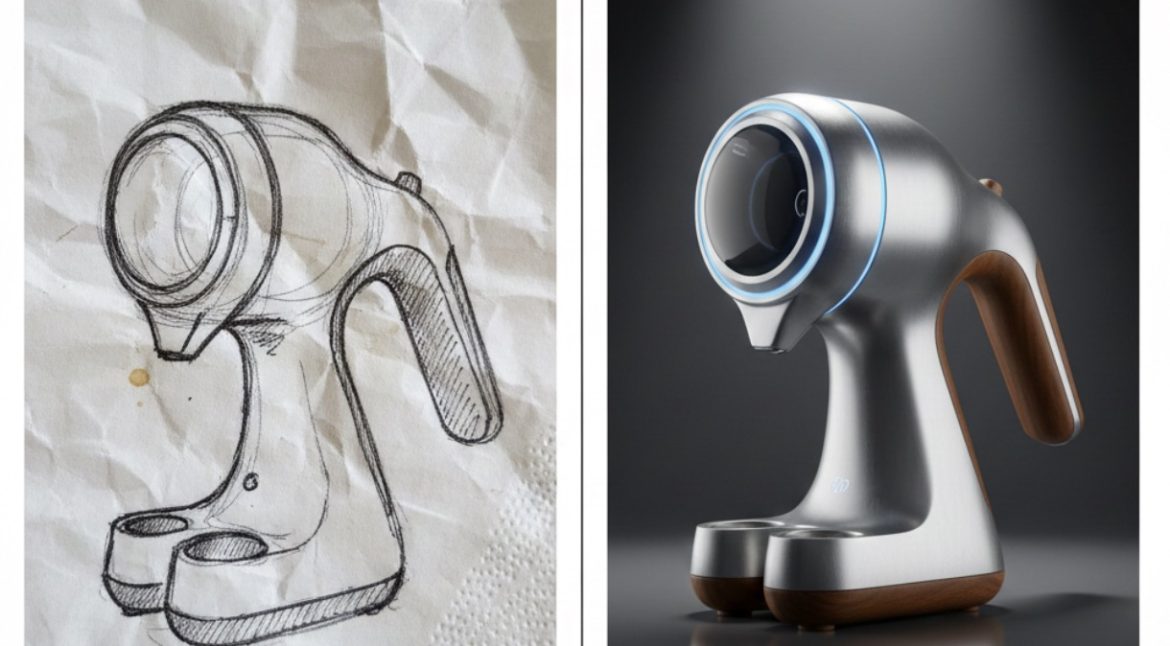
The most frustrating part of early-stage design is trying to communicate the “vibe” of a product before you’ve built it. Tools like Rendair AI and Vizcom have changed this.
You can now upload a photo of your hand-drawn sketch, type a prompt like “Futuristic handheld espresso maker, brushed aluminum finish, walnut accents,” and the AI will generate a photorealistic rendering in seconds. It respects your original lines while adding depth, lighting, and material textures.
Step 2: Rapid Iteration with “Image-to-Image”
Once you have your first render, the old way was to go back to the drawing board. The AI way is to iterate via conversation. * Need a different material? Use a “Generative Fill” tool in Adobe Firefly to swap that aluminum for matte carbon fiber.
- Want to change the shape? Use Midjourney’s Vary Region feature to tweak specific parts of the silhouette without starting over. This allows you to explore 50 variations of your product in the time it used to take to draw one.
Step 3: Turning Pixels into Print-Ready Geometry
The “Holy Grail” for makers is moving from a 2D image to a 3D file (.STL or .STEP) that a printer can actually understand.
- For Organic Shapes: Tools like Monaverse (MONA AI) or CommonSense Machines allow you to generate rough 3D meshes directly from images or text prompts.
- For Functional Parts: If your product needs to actually work, tools like nTop or the AI-assisted Autodesk Fusion are your best friends. These tools use “Automated Constraining” and generative logic to ensure your design is structurally sound and ready for the 3D printer bed.
Step 4: The Final Build
With your AI-optimized file ready, the last step is the physical one. Modern slicers like Ultimaker Cura now use AI to analyze your model’s geometry and suggest the perfect support structures and infill density, ensuring your print doesn’t fail at 3:00 AM.
The Tronix3D Takeaway
You no longer need a degree in industrial design to bring a physical product to life. The tools are here, they are accessible, and they are faster than ever. At Tronix3D, we specialize in taking those AI-generated designs and turning them into high-fidelity, industrial-grade reality.
Have a sketch you’re ready to bring into the real world? Upload your design to Tronix3D for a free printability audit: tronix3d.com/get-a-quote